Overview
 |
In order to display rates during checkout, you must have it least one shipping courier enabled. It must also have at least one shipping service enabled. |
Configuring your store to display rates at checkout begins with your product records.
How to Control Shipping Rates for a Product
- Open the products table:
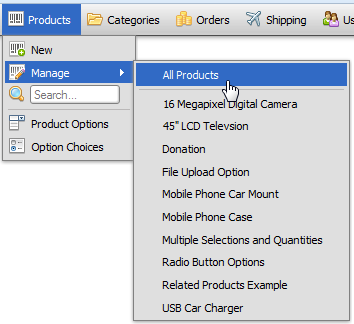
- Click on the product record you want to work with
- Make sure the Shippable field is checked near the top of the page:
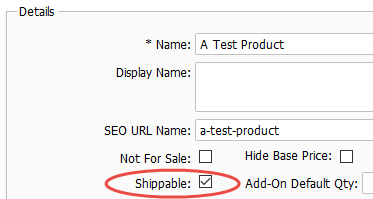
If it is not checked, you will not see shipping settings on the product record. - Locate the Shipping Settings fieldset:
- Specify your shipping settings in this area. You'll find more information on how to work with these settings further below on this page.
- When done click save changes.
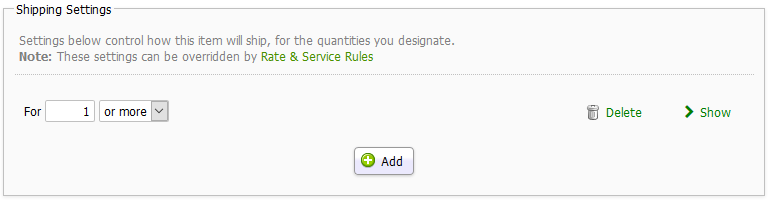
Shipping Settings
Working with Sets of Shipping Settings
The above image shows the Shipping Settings fieldset on the product record form as explained in the first section of this page. This section allows you to assign one or more sets of shipping settings for the product. The above image shows one set of settings.
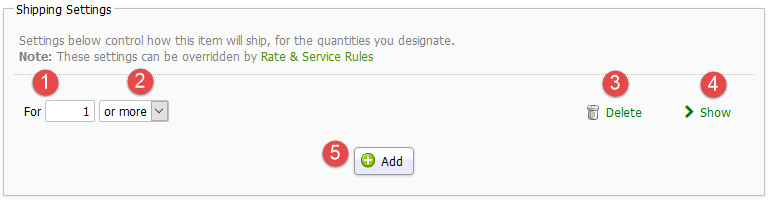
- Quantity 1
This field allows you to specify how many units the shipping settings correspond to. Squirrelcart allows you to add multiple sets of settings corresponding to product quantities. This would allow you for example to specify certain shipping rates for 1 unit, and different rates for 10. - Range
This allows you to specify a range corresponding to the quantity entered in #1. Options are as follows:
- or more
- to
- only
Quantity 2 (not shown above)
When the range is set to "to", and additional quantity field will appear to the right of the Range field: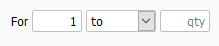
This field is used to specify the end of the range. For example, if you'd like to specify settings that will apply when there are between 1 and 10 units in the cart (inclusive), you would do so as follows:
Note that if you have the Price Scheme set to sell in sets, you will see an additional set name field at the end of the range. This is used to specify which units the shipping settings apply to: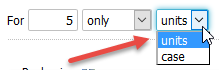
- Delete
Clicking this will delete the set of shipping settings (after saving the record). - Show / Hide
Clicking this will show or hide all of the settings within the set. The settings that appear are explained in the next section below. - Add
Clicking this will add a new set of shipping settings: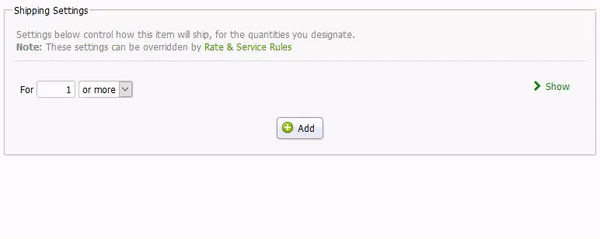
Shipping Settings Explained
This section explains the settings that appear when you click the Show link explained above. Note that the settings you see will vary based on your selections.
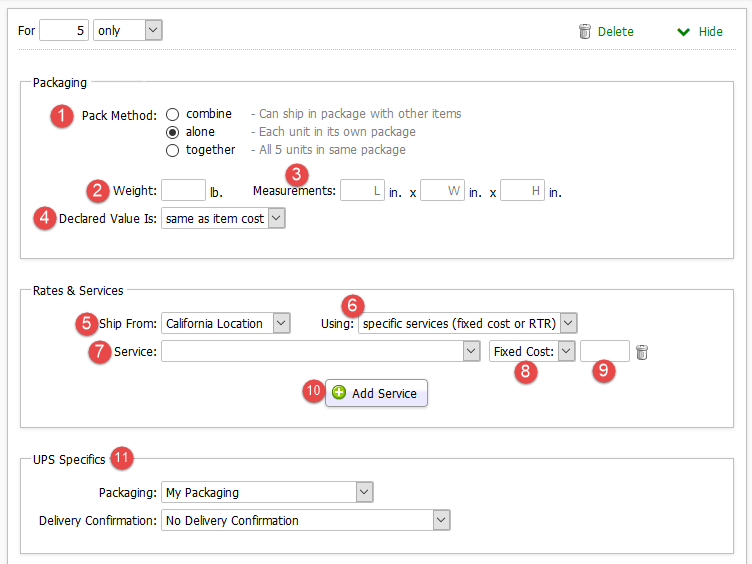
Packaging
1. Pack Method
This tells Squirrelcart how to virtually pack the items in order to determine shipping cost. Available options are:
- combine
This is the default. When set to combine Squirrelcart may include these items in a package with other items.
- alone
Each unit will be packed by itself in a separate package.
- together
All units will be packed in the same package. This option is only available when the quantity is set to a number larger than 1 and the range is set to only as in: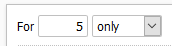
See the weight field below for examples on how this works.2. Weight
The weight corresponding to the package or item.
With a weight of 10 lbs, and the quantity and range shown below (5 only), here are some examples explaining what the weight would represent depending on the Pack Method.
Pack Method Explanation combine Each of the 5 units would weigh 10 lbs. If one unit of another item is in the cart and
weighs 2 pounds, all six units could be packed together in a package weighing 52 lbs.alone Each of the 5 units would weight 10lbs. The order would result in a shipment of
five packages, each weighing 10 lbs. The items would never be packed with other items.
The rest of the packaging settings represent each package.together All five units would be shipped in a single package weighing 10 lbs.
The rest of the packaging settings represent 1 package.
If Pack Method is set to combine, each unit of the 5 will weight 10 lbs.
3. Measurements
The length, width, and height of each package. This setting is not present when Pack Method is set to combine.
4. Declared Value Is
The declared value is used when requesting real-time rates from shipping courier APIs. It is used for determining insurance values and for customs when shipping internationally.
Rates & Services
5. Ship From
This is the address the package will ship from. This is used in real-time rate requests. To add or change locations, see the Warehouses topic.
6. Ship Using
This field controls what service(s) will be used for the shipment. Possible values are:
Enabled services (via Rules or RTR) -
This is the default option. When set, rates will be determined solely by Rate & Service Rules or real-time rates. Rate & Service Rules can be used to specify shipping rates for an entire order based on rules and conditions you assign. For example, you could offer certain services and rates based on the product total.
Specific services (fixed cost or RTR) -
This option allows you to choose specific services for this shipment. The cost can be a fixed price or determined via real-time rates. Note that this option is not available when the Pack Method is set to combine.
7. Service
8. Cost Type
9. Cost
These three fields are used to specify a service and its cost. Cost can be set to Fixed Cost, or Live Rate. When set to Fixed Cost, you can enter the price to the right.
10. Add Service button
This button is used to add one or more additional services for the shipment.
11. Courier specific settings
When real-time rates are enabled for a courier, you will see settings specific for that courier in this area. These settings control the packaging type, signature options, etc...
Note that the settings will not appear if the Pack Method is set to combine.
Example Configurations
In order to implement any of the example configurations below, you will need to have fully read the section above this one. You will also need to have at least one shipping courier and one shipping service enabled.
Configuring real time rates for all enabled services
To configure a product to use real time rates for all available enabled services, follow the steps below.
-
Enable real-time rates for at least one courier.
-
You can test rate lookups in the control panel to make sure they are working, by clicking Shipping > COURIER NAME > Rates & Services. Once you've confirmed rate lookups are working continue below.
-
Open a product record in the control panel (Products > Manage > All products)
-
Locate the Shipping Settings fieldset. (See the documentation above on this page for detailed help with these settings)
-
Specify a quantity range that your settings will apply to
-
Click the Show link to display the settings for that range
-
Set the Pack Method field to whichever option meets your needs
-
Specify a weight and dimensions (if the field is visible).
-
In the Rates & Services fieldset, set the Ship Using field to Enabled services (via rules or RTR)
-
If the Pack Method field is not set to combine, optionally specify courier specific settings.
-
Click the save changes button
Configuring real time rates for a specific service / product
By default, when real-time rates are enabled they will be offered for all available services. If you have a certain product that you would like to use real-time rates for but would like to limit the rates to 1 or more services, follow the steps below.
-
Enable real-time rates for at least one courier.
-
You can test rate lookups in the control panel to make sure they are working, by clicking Shipping > COURIER NAME > Rates & Services. Once you've confirmed rate lookups are working continue below.
-
Open a product record in the control panel (Products > Manage > All products)
-
Locate the Shipping Settings fieldset. (See the documentation above on this page for detailed help with these settings)
-
Specify a quantity range that your settings will apply to
-
Click the Show link to display the settings for that range
-
Set the Pack Method field to alone or together
-
Specify a weight and dimensions (if the field is visible).
-
In the Rates & Services fieldset, set the Ship Using field to specific services (fixed cost or RTR)
-
Select a service
-
Set the Cost Type to Live Rate
-
If you wish to add additional services click the Add Service button
-
Click the save changes button when done
Assigning fixed rates for a specific product
To specify one or more fixed rates for a product, follow the steps below:
- Open a product record in the control panel (Products > Manage > All products)
-
Locate the Shipping Settings fieldset. (See the documentation above on this page for detailed help with these settings)
-
Specify a quantity range that your settings will apply to
-
Click the Show link to display the settings for that range
-
Set the Pack Method field to alone or together
-
In the Rates & Services fieldset, set the Ship Using field to specific services (fixed cost or RTR)
-
Select a service
-
Set the Cost Type to Fixed Cost
-
Specify a price
-
If you wish to add additional services click the Add Service button
-
Click the save changes button when done
Assigning fixed rates using rules
Rate & Service rules can be used to assign one or more rates with a fixed cost using rules and conditions you specify such as:
-
order total
-
group membership
-
customer location
-
date
-
coupon code
-
etc...
They can also be used to override rates assigned by other means for special circumstances. See the Rate & Service Rules section for more info.
© 2001-2017 Lighthouse Development. All Rights Reserved.